3.3 MyID Operator Client user interface

The MyID Operator Client comprises the following elements:
- Title bar
- Self-service menu
- Category list
- Search form
- Display form
In the title bar, you can:
-
Toggle the display of the category list and the search form, click the tray button:
Button
Action

Hide the category list and search form.

Display the category list and search form.
- Click MyID to return to the landing screen.
In the self-service menu, you can:
-
Click the user icon to open or close the menu.
-
Collect any self-service requests.
-
Carry out other self-service tasks; for example, changing your device PIN.
-
Sign out.
See section 10, Carrying out self-service operations for details.
In the category list, you can:
- Click the category to display the appropriate search form; for example, click People to display the People search form. The More category contains links to administrative workflows in MyID Desktop, organized into several sub-categories; see section 9, Launching administrative workflows.
In the search form, you can:
- Complete any search details and click SEARCH.
- On the appropriate form, click ADD to add a new person or READ CARD to view details of a device.
-
Click the < button at the top to hide the search form.
The form hides automatically when you select a item in the search results. Click > to display the form again.
- Click the tabs to display different search options; for example, you can choose whether to search the MyID database or an attached directory, if your system is set up to do so. If there are more tabs than can be displayed on screen, click the > and < buttons to change the displayed tabs.
- Select Additional search criteria to display more search options. Select the additional criteria to add them to the search form. Click the close x buttons on the additional criteria to remove them from the search form.
In the display form, you can:
-
Click the sizing handle:

and drag to resize the results columns.
-
Select a record from the search results.
Search results are displayed in pages. Scroll to retrieve the next page of results automatically. The number of displayed results is shown at the top of the form.
Note: There is a limit to the number of search results returned in the display form. Standard searches have a limit of 200 items; LDAP searches have a default limit of 1000 items; and audit reports have a limit of 2000 items.
If more results are available, the text (scroll for more) appears. If the number of results exceeds the limit, a + sign is appended to the number of results; for example:
200+ results - 50 displayed (scroll for more)
- View details of the selected record.
- Click the tabs to display different categories of information about the selected record. If there are more tabs than can be displayed on screen, click the > and < buttons to change the displayed tabs.
-
To cancel an action form (for example, Edit Person or Request Device Issuance) and return to the viewing form, click the close button:

-
To close a viewing form and return to the search results list, click the back button:

You can use the back button to step back through several viewing forms. For example, if you view a person, click on a link to one of their devices, then click on a link for open requests for that device, you can click back to go back to the device, then back to go back to the person.
3.3.1 Using the button bar
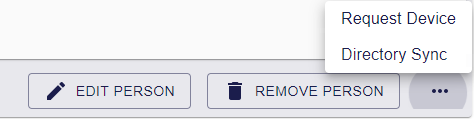
Use the buttons at the bottom of the form to carry out actions on the selected item; for example, you can edit a person's user account, or request a device.
The options available depend on your system configuration, the status of the item you are viewing, and your role permissions. The button bar displays the four most relevant actions; click the ... option to display more available actions.
Note: You can change the number of buttons displayed in the button bar. See section 11.4.12, Changing the number of buttons displayed in the button bar
3.3.2 Launching MyID Desktop or Self-Service App workflows
Some operations listed on the button bar (for example Reset Card PIN) and operations in the self-service menu are carried out by launching a MyID Desktop workflow or a Self-Service App action; this allows you to perform activities in MyID Operator Client (such as interacting with smart cards) that are implemented in a native client rather than the browser. To use these features, you must have the MyID Client Service, MyID Desktop, and the Self-Service App installed.
Note: If you have not installed MyID Desktop or the Self-Service App to their default locations, you must configure the MyID Client Service with its installed location; see section 11.4.8, Setting the location of MyID Desktop or the Self-Service App for details.
When you launch MyID Desktop or the Self-Service App from the MyID Operator Client, the application is authorized to carry out a single task; for example, resetting a card's PIN. When you have completed the task and clicked Finish, the application window closes and control is returned to the MyID Operator Client window. If you close the MyID Operator Client browser window after launching the application, you can still complete the single task; it does not rely on the browser window remaining open.
Important: To use this feature, you must upgrade your MyID Client Service, MyID Desktop, and Self-Service App software to the latest versions.
3.3.3 Working on multiple records
If you want to work on multiple records (for example, to edit multiple people, or cancel multiple requests) you can use the select option in the results screen, then work through the records one by one. Search for the records you want to work with, and the results appear.
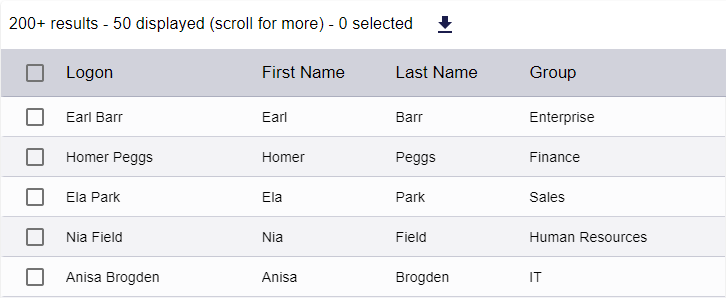
In the above example, you have searched for everyone in your organization; however, you only need to edit three of the people listed, not all of them.
Use the checkboxes at the left of each record to mark the records you are interested in.
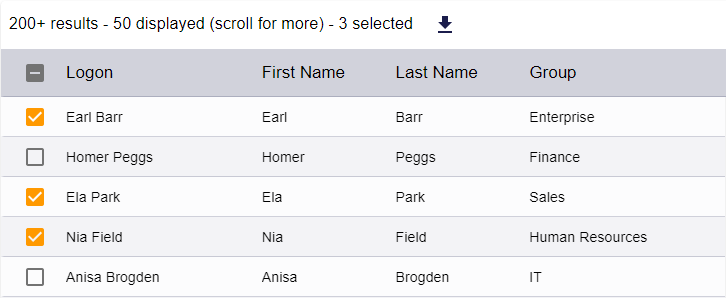
Note: You can mark or deselect all records using the checkbox in the header.
Once you have marked the records you want to work with, click on any marked record to open the set.
Note: If you click a record that is not marked, that record opens, and is not included in the set; however, if you return to the results list, you will not have lost your marked records.
The navigation toolbar at the top right of the record shows your position in the results set and allows you to move between records:

To navigate the records:
-
To view the previous record, click the Previous button:

-
To view the next record, click the Next button:

-
To return to the search list, click the Return to results button:


3.3.4 Displaying dates and times
Dates and times are displayed in the MyID Operator Client based on the server settings rather than the browser or operating system settings.
By default, the MyID Operator Client uses the following date and time format:
-
MM/dd/yyyy, hh:mm:ss a – for example, 09/18/2021, 8:58:11 AM.
If you want to use different time and date formats, for example for different locales, you can customize the server dictionaries; contact customer support quoting SUP-138 for details.
3.3.5 Entering dates and times
To edit a date on a form, you can type the date into the field. When you click within an empty field, the expected format is shown:

Important: If you have customized the date format on your server, the display format and the date entry format may be different. The date display format is determined by the server settings, while the date entry format is determined by your browser locale.
If you type an invalid date, the field displays a warning:

To select the date instead of typing it, you can click the calendar button:

This displays the calendar control:
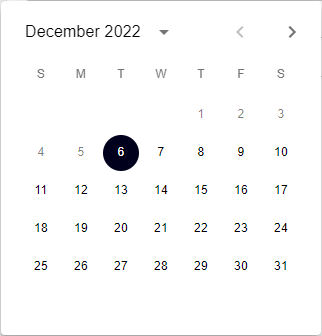
Select the date you want to use, then click OK.
Note: The accepted range for all dates is January 1 1900 to January 1 2100.
3.3.6 Using the browser location bar
The location bar of your browser updates with the current location within the MyID Operator Client website. You can bookmark these links, or send them to other operators; when you click on these links, you authenticate to the MyID Operator Client website if necessary, then open the page at the correct location, if your role and scope permissions allow you to do so, and the specified item still exists.
For example, you can create links for the following:
-
The front page.
For example:
https://servername/MyID/OperatorClient/#/
-
A particular category.
For example:
https://servername/MyID/OperatorClient/#/people
https://servername/MyID/OperatorClient/#/devices
https://servername/MyID/OperatorClient/#/requests
-
A set of search criteria.
For example:
https://servername/MyID/OperatorClient/#/people?logonName=*don*
https://servername/MyID/OperatorClient/#/people?groupId=6480C875-C564-4B8E-A761-E373181F13DA&includeSubgroups=1
https://servername/MyID/OperatorClient/#/requests?status=Awaiting+Validation
This allows you to bookmark frequently-used search screens. For example, you may want to create a search for people in a particular group, users whose logon name contains a particular string, or a list of requests that are awaiting validation.
-
A particular person, device, or request.
For example:
https://servername/MyID/OperatorClient/#/people/0F3E10FE-8B80-4FA4-BF21-556A4E370C6F
https://servername/MyID/OperatorClient/#/requests/27A62218-A95B-45FF-A722-F70FB2273E70
This allows you to send a link to another operator; for example, you may have raised a device request for a person that requires validation. You cannot validate the device request as you raised it, so you can ask another operator to validate the request, and provide a link to the request to make it easy for them to locate.
-
An action on a particular person, device, or request.
For example:
https://servername/MyID/OperatorClient/#/people/0F3E10FE-8B80-4FA4-BF21-556A4E370C6F/100107
-
An Add button action.
For example:
https://servername/MyID/OperatorClient/#/people/add
-
If you want to open the screen with the category list and search form hidden, for example if you are embedding the MyID Operator Client screen in an iframe on your intranet page, you can add /embedded after the # in the URL; for example:
https://servername/MyID/OperatorClient/#/embedded/people/0F3E10FE-8B80-4FA4-BF21-556A4E370C6F
Note: Each embedded MyID Operator Client screen requires authentication.
3.3.7 Opening a new tab or window
If you have a list of search results, you can right-click on an item in the list, then select either Open in a new tab or Open in a new window from the pop-up menu; the MyID Operator Client opens a new tab or window at the appropriate location.
You can also right-click on buttons to open in a new tab or window if the action of the button would be to open a new screen; for example, you can right-click Request Device, which opens the Request Device Issuance screen, but you cannot open Directory Sync in a new tab or page, as this action does not open a new screen.
Note: When you open a screen in a new tab or new window, the category list and search form are automatically hidden. To toggle the display of the category list (and search form, if appropriate), click the tray button:
3.3.8 Selecting a group
The Group option appears on several forms:

Click the box to open the Group dialog, which allows you to select a group from the MyID database or from your directory.
Once you have selected a group, its name appears in the box; if the group has a description, it is displayed beneath the box.

3.3.8.1 Selecting a group from a directory
When you are viewing the groups from a directory (for example, when searching for a person), MyID displays a hierarchical list of the groups in the directory, with Source: Directory displayed at the top of the dialog.
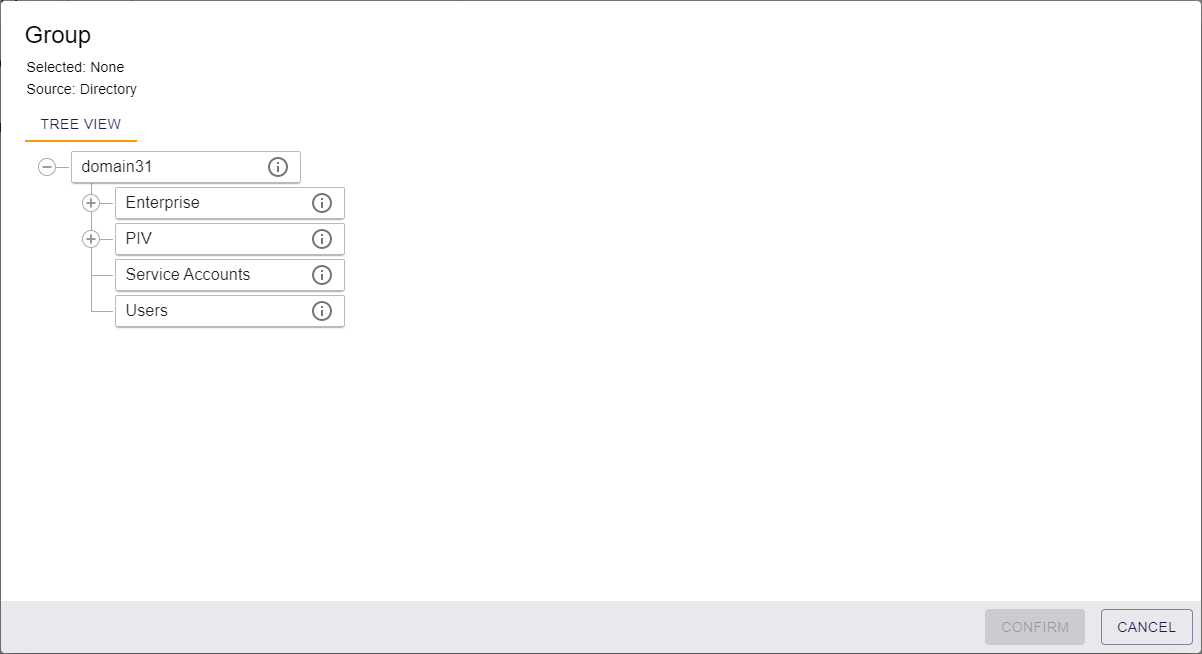
- Click the expand group icon
 to expand a group
 - Click the close group icon
 to close a group.
 - Click the group information icon
 to display information about the group.
 - Select a group from the tree; its name is displayed at the top of the dialog.
- Click Confirm to confirm your selection and close the dialog.
3.3.8.2 Selecting a group from the MyID database
When you are viewing the groups from the MyID database (for example, selecting the group for a device or request), MyID displays a hierarchical list of the groups in the database, with Source: MyID displayed at the top of the dialog.

- Click the expand group icon to expand a group
- Click the close group icon to close a group.
- Click the group information icon to display information about the group.
-
Click Show group description to display the descriptions for the groups instead of their names.
Note: If a group does not have a description, its name is displayed instead.
- Select a group from the tree; its name is displayed at the top of the dialog.
- Click Confirm to confirm your selection and close the dialog.
Note: If your system is configured for administrative groups, you can also select any of the groups for which you have administrative access, even if they are not within your own scope. Administrative groups are displayed at the bottom of the list in a separate node. For more information, see section 4.6, Working with administrative groups.
As an alternative to the hierarchical tree view, you can display the available groups as a drop-down list; select the List View option.
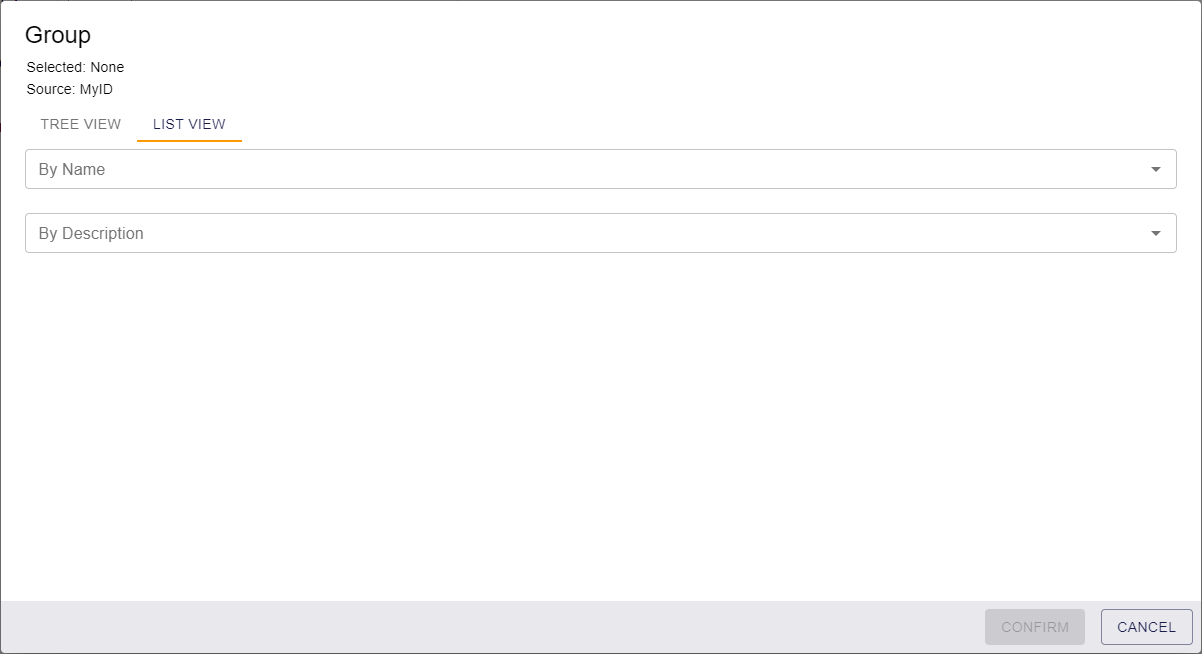
Select a group name from the By Name drop-down list, or select a group description from the By Description drop-down list.
You can type in the box to filter the available values; for example, typing support may return:
-
IT Support and Services
-
Hardware Support and Services
-
Software Support and Services

Note: If a group does not have a description, it does not appear in the By Description drop-down list; you must select it from the By Name drop-down list instead.